

Just got your shopgalactica Large Keyboard? 🎉 This guide will help you get set up, connect to your devices, change the lighting, customise the LCD screen and use VIA for advanced key remapping.
This guide is for shopgalactica’s Large Keyboard, built on the GMK104 platform.
Important: When pairing with Bluetooth, the keyboard may appear as
ZUOYA GMK104-1,ZUOYA GMK104-2orZUOYA GMK104-3. This is normal.
What can this keyboard do?
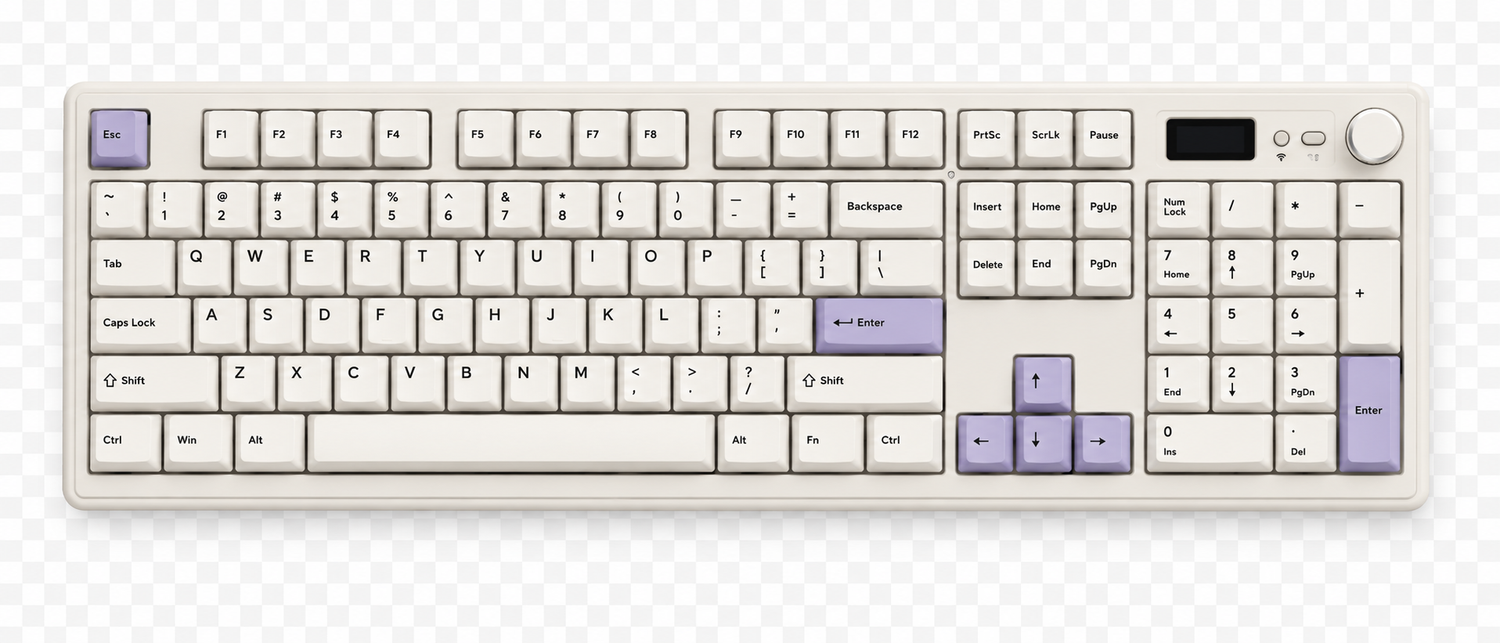
Your Large Keyboard includes:
- Full-size keyboard layout with number pad
- USB wired mode
- Bluetooth connection for up to three devices
- 2.4 GHz wireless connection
- RGB keyboard lighting
- TFT-LCD screen
- Volume knob
- Windows and Mac modes
- Custom LCD images and animations
- VIA key remapping and customisation

Before you start 📌
Make sure you have:
- Your keyboard
- A USB cable
- The 2.4 GHz receiver, if you want to use wireless mode
- A Windows PC, if you want to upload custom images or animations to the LCD screen
Your keyboard has switches on the back for:
- Bluetooth, USB/Wired and 2.4 GHz connection modes
- Windows and Mac modes
Choose how you want to connect
Your keyboard can connect in three ways: USB, Bluetooth or 2.4 GHz wireless.
USB / Wired Mode 💻
This is the quickest and simplest option.
- Move the keyboard’s connection switch to USB / Wired Mode.
- Connect the keyboard to your computer using the USB cable.
- The LCD screen should turn on when the keyboard is connected.
Bluetooth Mode 🛜
The keyboard can save up to three Bluetooth devices. For example, you could connect your laptop, tablet and phone.
Pair a new Bluetooth device
- Move the connection switch to Bluetooth Mode.
- Choose a Bluetooth slot:
| Device | Shortcut |
|---|---|
| Device 1 | Hold Fn + Q for 3–5 seconds |
| Device 2 | Hold Fn + W for 3–5 seconds |
| Device 3 | Hold Fn + E for 3–5 seconds |
- The BT1, BT2 or BT3 symbol should begin flashing on the LCD screen.
- Open Bluetooth settings on your device.
- Select the matching keyboard name:
ZUOYA GMK104-1ZUOYA GMK104-2ZUOYA GMK104-3
- Once connected, the Bluetooth symbol will stop flashing.
Switch between saved devices
| Device | Shortcut |
|---|---|
| Device 1 | Fn + Q |
| Device 2 | Fn + W |
| Device 3 | Fn + E |
The keyboard should remember the last Bluetooth device it used and reconnect when switched on again.
2.4 GHz Wireless Mode
Use the included 2.4 GHz receiver for a wireless connection to your computer or compatible device.
- Move the connection switch to 2.4 GHz Mode.
- The 2.4G symbol on the LCD screen should start flashing.
- Plug the 2.4 GHz receiver into your device.
- Once connected, the 2.4G symbol should stop flashing.
Re-pairing the receiver
Your receiver should already be paired. Only use these steps if it stops connecting.
- Hold
Fn + R. - The 2.4G symbol should flash quickly.
- Plug the receiver into a USB port.
- Wait for the symbol to stop flashing.
Use the volume knob 🔊
The knob in the upper-right corner controls your volume.
- Turn it clockwise to increase volume.
- Turn it anti-clockwise to decrease volume.
- Press it down to mute or unmute.
Your keyboard also has two multimedia buttons near the LCD screen:
- The first button turns keyboard lighting on or off.
- The second button turns the LCD screen on or off.
Change your RGB lighting ⚡
Hold Fn and press the following keys:
| Shortcut | What it does |
|---|---|
Fn + ↑ |
Increase brightness |
Fn + ↓ |
Decrease brightness |
Fn + ← |
Change RGB colour in one direction |
Fn + → |
Change RGB colour in the other direction |
Fn + | |
Change lighting mode |
Fn + - |
Slow down lighting effects |
Fn + = |
Speed up lighting effects |
Fn + [ |
Make colours more vivid |
Fn + ] |
Make colours less vivid |
The
\|key is the backslash/pipe key, usually near Enter.
Use media shortcuts 🎵
| Shortcut | What it does |
|---|---|
Fn + F1 |
Open music player |
Fn + F2 |
Volume down |
Fn + F3 |
Volume up |
Fn + F4 |
Mute |
Fn + F5 |
Stop media |
Fn + F6 |
Previous track |
Fn + F7 |
Play or pause |
Fn + F8 |
Next track |
Fn + F9 |
Open email |
Fn + F10 |
Open web browser |
Fn + F11 |
Open calculator |
Fn + F12 |
Search |
Fn + Windows |
Lock or unlock the Windows key |
Fn + Enter |
Change LCD profile |
Hold Fn + Space for 3 seconds |
Restore keyboard settings |
Some shortcuts may work differently depending on the device or app you are using.
Understand the indicator lights
The keyboard has indicator lights near the LCD screen.
Device indicator
| Colour | Meaning |
|---|---|
| Red | Bluetooth Device 1 |
| Green | Bluetooth Device 2 |
| Blue | Bluetooth Device 3 |
| Cyan | 2.4 GHz pairing mode |
Charging indicator
| Colour | Meaning |
|---|---|
| Red | Keyboard is charging |
| Green | Keyboard is fully charged |
Customise the LCD screen 😎
You can upload still images and animations to the keyboard’s LCD screen.
The keyboard supports up to two custom display sets. Press Fn + Enter to move between LCD profiles.
What you need
- A Windows PC
- The keyboard connected in USB / Wired Mode
- The GMK104 Image Custom Tool
- An image or animation you want to upload
Uploading your own visual
- Connect the keyboard in USB / Wired Mode.
- Download and install the GMK104 Image Custom Tool.
- Open the software.
- Select your image or animation.
- Upload it to the keyboard.
- Keep the keyboard connected until the upload is complete.
Mac users can use the keyboard normally, but a Windows PC is recommended for uploading custom LCD visuals.
Download GMK104 Image Custom Tool
Please refer to our Image Custom Tool blog for a step-by-step breakdown.
Change keys with VIA
VIA is optional software that lets you customise what your keys do.
With VIA, you can:
- Change key functions
- Create macros
- Set up extra layers
- Adjust supported RGB settings
- Test individual key presses
Before using VIA
VIA needs a small setup file called a JSON file. Use the file that matches how your keyboard is connected.
| Connection type | File to use |
|---|---|
| USB / Wired Mode | GMK104 Wired JSON |
| 2.4 GHz receiver | GMK104 2.4G JSON |
Do not use a file for the GMK67, GMK87 or another keyboard model.
Download GMK87 VIA files
Open VIA Configurator
The MKB download centre currently lists separate GMK104 Wired JSON, 2.4G JSON and Image Custom Tool downloads.
How to use VIA
- Connect the keyboard using the same connection type as your JSON file.
- Download the matching GMK104 JSON file.
- Open the VIA Configurator.
- Load the JSON file.
- Click the key you want to change.
- Choose the new function for that key.
- Use the Key Tester section to check that the keyboard is being detected.
Your changes are saved to the keyboard, so they should remain after it is unplugged.
What are layers?
Layers are extra keyboard layouts.
- Layer 0 is the standard keyboard layout.
- Layers 1, 2 and 3 are extra layouts you can set up in VIA.
Most people will only need the standard layout. Layers are useful when you want one key to do different things in different situations.
Mac mode
When the keyboard is set to Mac mode:
| Keyboard key | Works as |
|---|---|
| Left Alt | Left Option |
| Left Windows | Left Command |
| Right Alt | Right Option |
Sleep mode and charging💤
To save battery:
- The LCD screen turns off after around 5 minutes without use in Bluetooth or 2.4 GHz mode.
- Press any key to wake the screen.
- In Bluetooth mode, the keyboard enters deep sleep after around 30 minutes without use.
- Press any key to wake it and reconnect.
When the battery is low, the battery symbol on the LCD screen turns red. A charging symbol appears while the keyboard is charging.
Common problems and quick fixes 🔨
Bluetooth is not connecting
- Make sure the keyboard is in Bluetooth Mode.
- Hold
Fn + Q,Fn + WorFn + Efor 3–5 seconds. - Wait for the Bluetooth symbol to flash.
- Remove the old keyboard entry from your device’s Bluetooth settings.
- Pair the keyboard again.
The 2.4 GHz receiver is not connecting
- Make sure the keyboard is in 2.4 GHz Mode.
- Hold
Fn + R. - Wait for the 2.4G symbol to flash.
- Plug the receiver into a USB port.
- Wait for the symbol to stop flashing.
VIA cannot find the keyboard
- Check that the keyboard is connected properly.
- Make sure you are using the correct connection mode.
- Use a Wired JSON file for USB mode.
- Use a 2.4G JSON file for 2.4 GHz mode.
- Do not use a file for another keyboard model.
- Close and reopen VIA after loading the correct JSON file.
The LCD image is not updating
- Use the GMK104 Image Custom Tool.
- Use a Windows PC.
- Connect the keyboard in USB / Wired Mode.
- Keep the keyboard connected until the upload finishes.
- Press
Fn + Enterto check the other LCD profile.
The keyboard lights are off
- Use the first multimedia button near the LCD screen to turn keyboard lighting back on.
- Press
Fn + \|to change the lighting mode. - Increase brightness with
Fn + ↑. - Hold
Fn + Spacefor 3 seconds to reset keyboard settings.
🤔Stuck or need help?
Don’t worry - our team’s got your back: 😁
Join our Discord for real-time help: https://discord.gg/GrcrexEXgB
Or shoot us an email: support@shopgalactica.com

Leave a comment
All comments are moderated before being published.
This site is protected by hCaptcha and the hCaptcha Privacy Policy and Terms of Service apply.